Note: \ in the end of line, means to continue line
Quantization and Color reducing
Anyway, for one who interested in imagemagick way:
First, to generate Genesis Colors, according to this:
Put in file genesis_colormap.txt such info:
Code: Select all
# ImageMagick pixel enumeration: 8,1,255,Gray
0,0: (0,0,0)
1,0: (9,9,9)
2,0: (16,16,16)
3,0: (22,22,22)
4,0: (27,27,27)
5,0: (32,32,32)
6,0: (38,38,38)
7,0: (47,47,47)Code: Select all
convert -size 32x16 xc: \
   -channel R genesis_colormap.txt -fx "v.p{i&7,0}/47*255" \
   -channel G genesis_colormap.txt -fx "v.p{j&7,0}/47*255" \
   -channel B genesis_colormap.txt -fx "v.p{(i>>3)|((j>>3)<<2),0}/47*255" \
   -scale 600%% -filter point genesis_colormap.png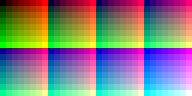
And after it, if you want to translate image into Genesis Colors:
Code: Select all
convert my_img.png -dither Riemersma -remap genesis_colormap.png my_img_gen.pngCode: Select all
convert my_img.png -dither Riemersma -colors 15 +dither -remap genesis_colormap.png my_img_15.png


Almost all settings:
Code: Select all
сonvert my_img.png -colorspace <colorspace> -quantize <colorspace> -dither <dither> -colors <number> +dither -remap genesis_colormap.png my_img_gen.pngDither: Riemersma, FloydSteinberg, None.
Two pass:
Code: Select all
сonvert my_img.png -colorspace <colorspace> -quantize <quantize> +dither -colors <number> -unique-colors _tmp_map.png
сonvert my_img.png -quantize <quantize> -dither <dither> -remap _tmp_map.png my_img_gen.pngIf someone knows how to set dither strength, then please, let me know too.
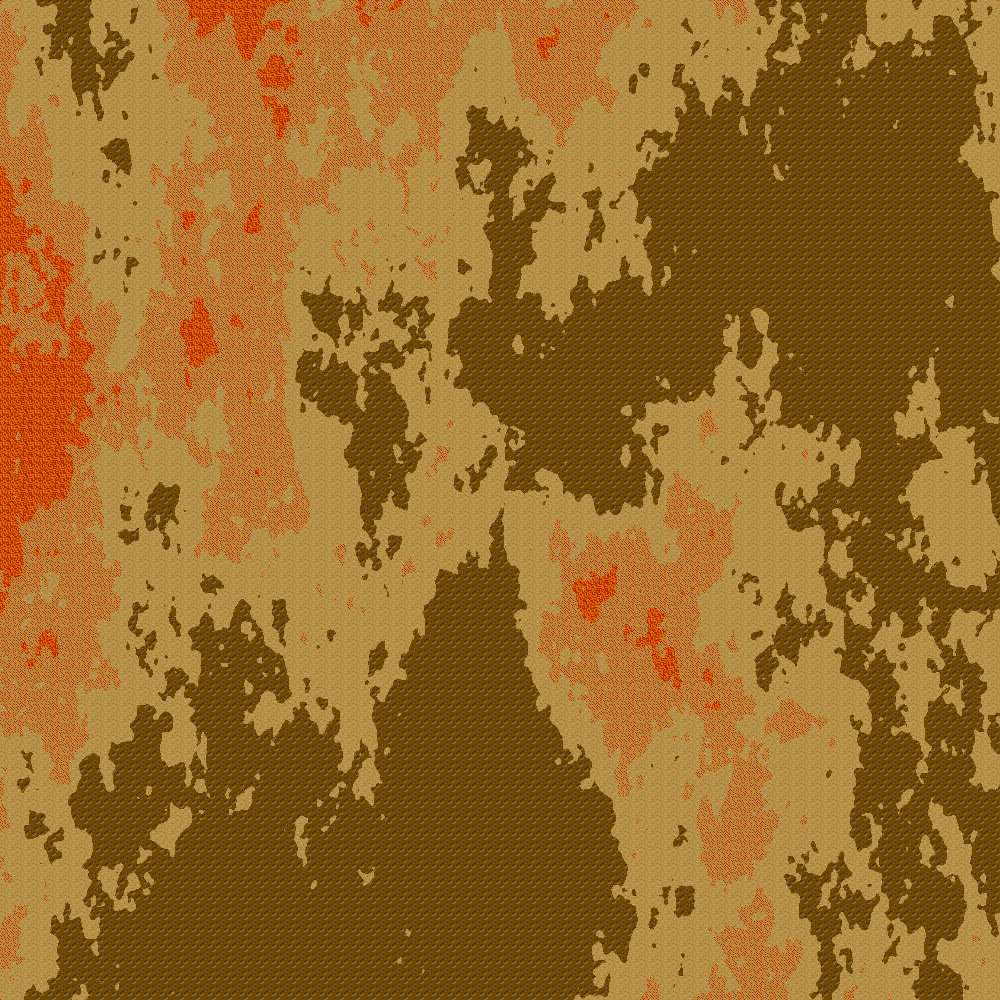
Random Maps Generation
This is something, that I tested some months ago.
Example result:
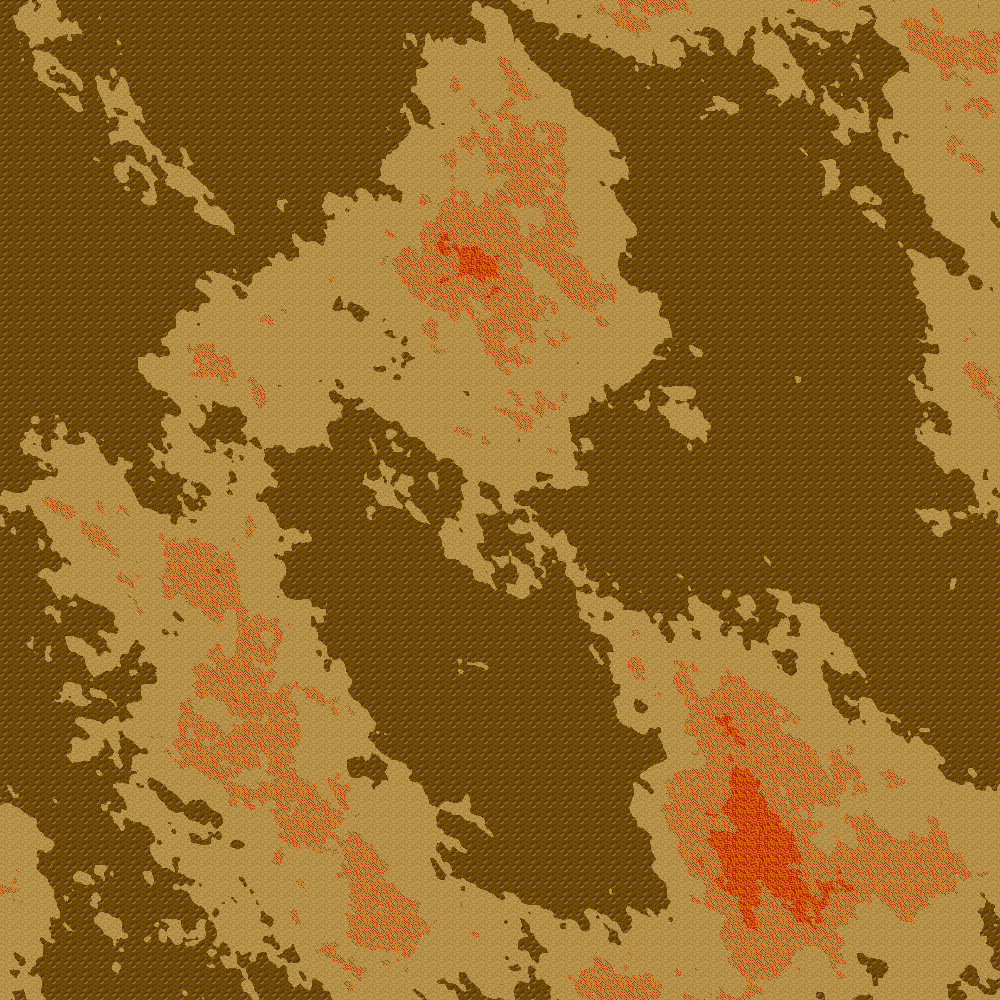
I have done it with command:
Code: Select all
convert -size 1000x1000 plasma:gray50-gray50 -blur 0x2 \
                 -channel G -auto-level +channel -set colorspace sRGB \
                 tiles.gif -virtual-pixel tile  -fx "u[floor(7.999*u.g)+1]" \
                 map.png
How does this work:
1) ImageMagick generates fractal "plasma": http://en.wikipedia.org/wiki/Diamond-square_algorithm
2) Next, gray channel maps into several levels (7 in this example).
3) Each level will correspond to certain layer (dirt, sand, spice...)
Result of this program obviously rough. But, with making some improvements, and may be pre/post processing, you can get good results.
One more example:
Code: Select all
convert -rotate 45 -size 1415x1415 -seed 12 plasma:gray50-gray50 -blur 0x2 \
                 -channel G -auto-level +channel -set colorspace sRGB \
                 -crop 1000x1000+207+207 -fx 'floor(8.7*u.g)/8'  map1.png
convert -rotate 45 -size 1415x1415 -seed 12 plasma:gray50-gray50 -blur 0x2 \
                 -channel G -auto-level +channel -set colorspace sRGB \
                 -crop 1000x1000+207+207 \
                 tiles.gif -virtual-pixel tile -fx 'u[floor(8.7*u.g)+1]'  map2.png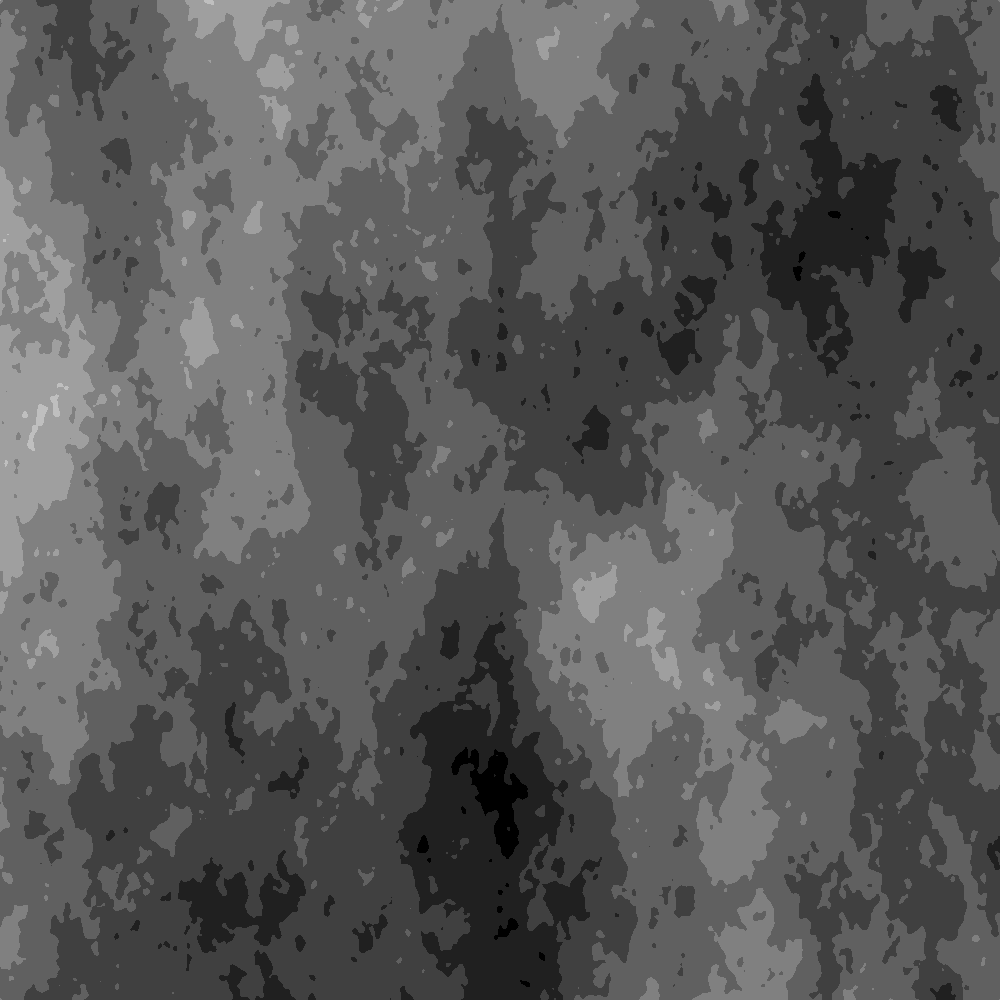


